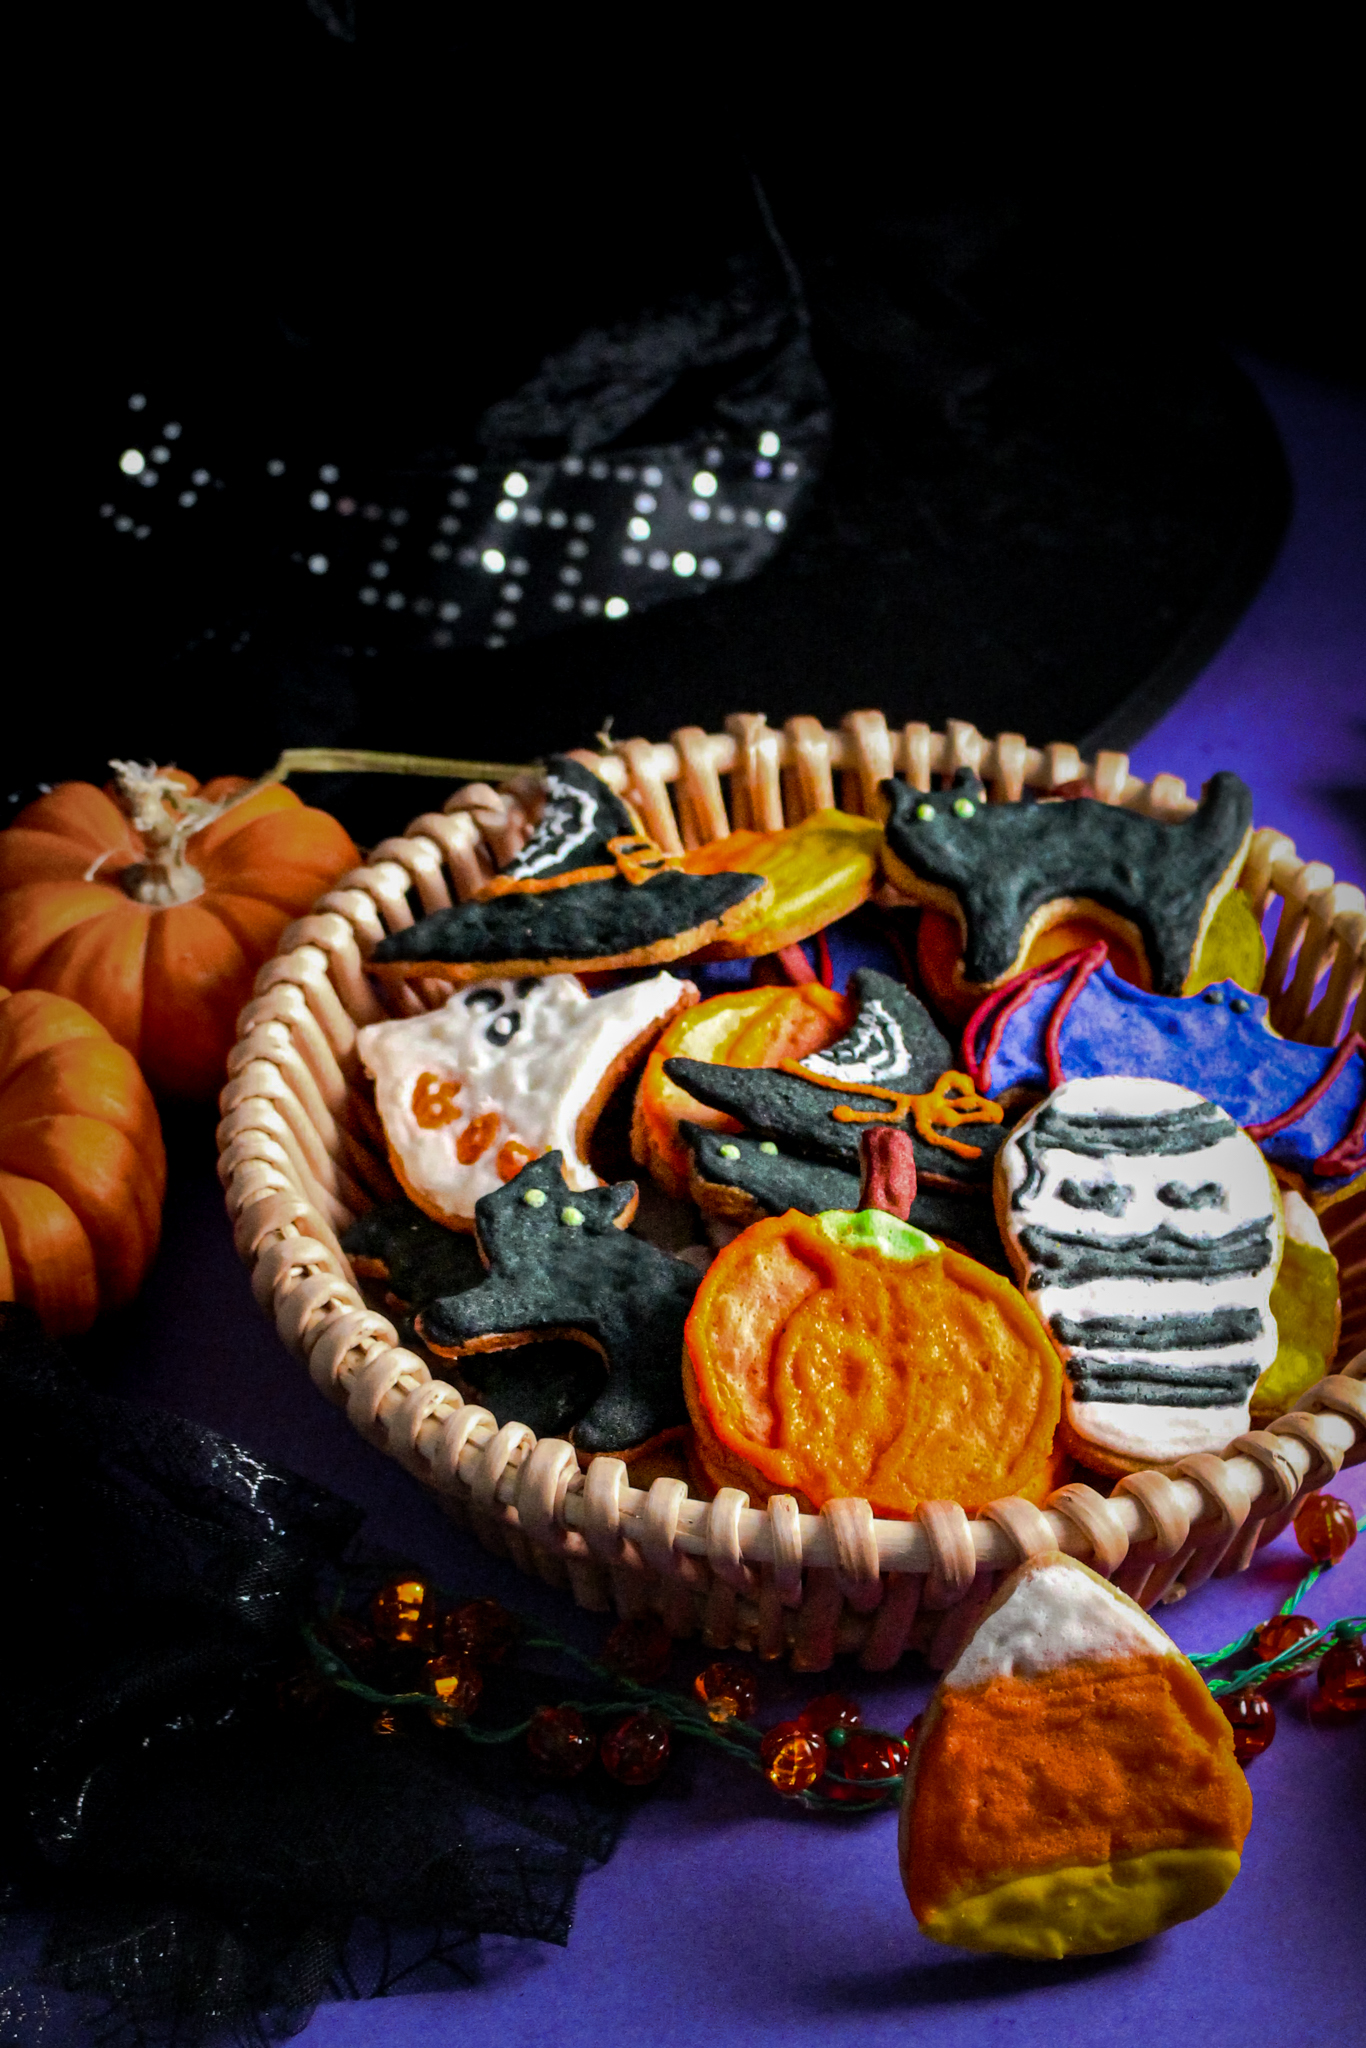
If you’re looking for a tasty, fun-to-make Halloween cookie recipe, then this recipe is for you. Decorated with colorful royal icing, these yummy cookies are adorable, spooky, and perfect for Halloween!
Yield: 36 cookies
Serving size: 1 cookie
Ingredients for the cookie:
- 3 cups (336g) super fine almond flour
- 1/4 cup +1 tsp. (52g) natural, non-GMO granular erythritol
- 1/4 tsp. (1.5g) salt
- 1/2 tsp. (2.4g) baking powder
- a pinch of nutmeg
- 2 large eggs
- 4oz (113.4g) cream cheese, softened
- 1 tbsp. (15g) pure vanilla extract
- 1/8 tsp. (0.65g) pure orange extract
Ingredients for the royal icing:
- 2 cups (288g) natural, non-GMO confectioners/powdered erythritol
- 4 tbsp (56.7g) egg white powder
- 1/2 cup (118.5g) water
- 1 tsp. (5g) pure vanilla extract
- 1/8 tsp. (0.65g) pure orange extract
- optional: sugar-free food coloring
Directions for making the cookies:
- Preheat the oven to 350° F (180°C) and line two cookie sheets with parchment paper.
- Add the almond flour to a large bowl.
- Add in the granular erythritol, salt, baking powder, and nutmeg.
- Using a fork, break up any lumps and mix well.
- Use the fork to form a well in the center of the flour mixture.
- To the well, add the eggs, cream cheese, and extracts.
- Using the fork, mix the ingredients until a sticky dough begins to form.
- Turn the dough out onto a clean work surface and knead it until it forms a well combined and workable cookie dough.
- Shape the dough into a ball. Break off a chunk of the ball to roll out, and wrap the rest of it in a piece of parchment paper to keep it from drying out.
- Place the unwrapped piece of dough onto a sheet of parchment paper. I like to use blue painter’s tape to roll out the cookie dough and secure my parchment paper to my work surface. Doing this keeps the paper in place, making rolling out the dough a lot easier. I’ve demonstrated how to do this in the video above.
- Place another piece of parchment over the top of the dough, and using your hands, press to flatten it out a bit.
- Roll the dough out to an even thickness of about one-eighth to one-quarter of an inch thick using a rolling pin. (0.32-0.64 cm)
- Remove the top sheet of paper and grab your favorite Halloween cookie cutters.
- Use the cutters to cut out cookies, and carefully place them onto the lined cookie sheet.
- When the cookie sheet is full, place it into the preheated oven to bake for about 15 minutes or until the cookies are lightly golden brown around the edges.
- Repeat the process until you have used all of the dough, re-rolling the scraps as needed.
- Cool the baked cookies completely before icing.
Directions for making the icing:
- Place the powdered erythritol and the egg white powder into a bowl.
- Use a whisk to break up any lumps and combine the powders.
- Add in the water. Using an electric mixer, blend well.
- Add in the vanilla and the orange extract.
- Scrape down any powder off the sides of the bowl, and using an electric mixer, whip until the mixture forms soft peaks. This part will take some patience and may require switching hands now and then, as it can take a few minutes to reach the desired consistency.
- When the icing is ready, you can divide it up to make different colors using food coloring. *See my note on sugar-free food coloring below this recipe.
Decorating the cookies:
- You can use either a pastry bag with a small decorating tip or a plastic storage bag with just a tiny bit of the corner cut off to decorate your cookies. To avoid getting stained hands, I recommend wearing disposable gloves.
- Begin by outlining a cookie with the icing. Then fill in the middle.
- Use a toothpick to blend and spread the icing evenly across the cookie.
- Use the point of the toothpick to get rid of any air bubbles in the icing. You can watch the above video for a demonstration of how to ice the cookies.
- It’s best to wait for the first coating of icing to dry completely before applying more. If you want a double layer of icing on your cookies, let the cookies dry completely and make a fresh batch of icing. I’ve also found that laying colors next to each other works best if you allow the first color to set a little.
- Allow the finished decorated cookies to dry completely before storing them. Store in a covered container in the refrigerator.

*Note: In developing this recipe, I noticed that most of the more familiar brands of food coloring contain some form of sugar, and usually, it’s one of the first ingredients listed, which means it’s the predominant ingredient used. I was surprised by how difficult it is to find a food coloring that doesn’t have sugar. The food coloring I use contains no sugar or corn syrups. It’s 100% sugar-free, and it’s compliant with both the ketogenic and diabetic diets. The company that makes these food colorings is an American company called Decopac. Decopac is a brand widely used in commercial bakeries. You can’t order directly from the company unless you have a business account with them. They don’t sell their products to consumers, but I found that you can order them from Amazon, and I’ll put the links for you below this note. I need to let you know that I am in no way affiliated with Decopac, and I earn nothing for telling you about their product. This is just me, trying to help you find compliant ingredients so that you can have fun baking without derailing your health or your progress. Each bottle of color costs between 5-8 dollars. So, they are a bit of an investment, but the bottles are large, and the expiration dates on the bottles I just purchased are good until July of 2026! They’ll be good for years of baking, and with the holiday seasons right around the corner, I know I’ll be putting them to good use. They come in many vibrant colors, so a little goes a long way, too.
Here are the links ⬇️⬇️⬇️
DECOPAC PREMIUM AIRBRUSH COLOR MULTIPACK: https://amzn.to/3pbg45r
DECOPAC PREMIUM AIRBRUSH COLOR – WHITE: https://amzn.to/2XelReI
DECOPAC PREMIUM AIRBRUSH COLOR – VIOLET: https://amzn.to/3FOqm12
DECOPAC PREMIUM AIRBRUSH COLOR – SUNSET ORANGE: https://amzn.to/3FS4WQA